The first three months
14/02/17 09:34
We like the house and it is working more or less as expected. We did have a problem with the heating in that the supplied Heatmiser thermostat that controlled the MVHR Duct Heater could only be set to integer degrees - 20 was too warm and 19 too cold! I replaced this with a Netatmo thermostat which has proved to be simple to use and the data provided helps us understand what the house is doing.
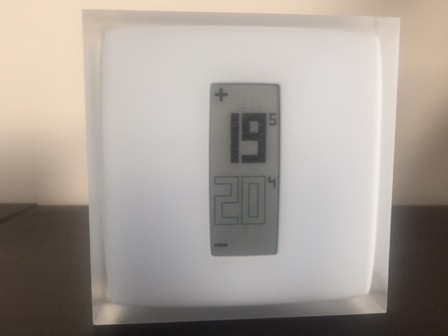
We have it located in our bedroom and the temperature is similar across all the first floor. It can be controlled from anywhere using an app or web browser.
In mid-December we installed another Far infrared heater in the lounge and this partially resolved the heating issues that were caused by the distribution of heat from the MVHR duct heater (see We've moved in! - December)
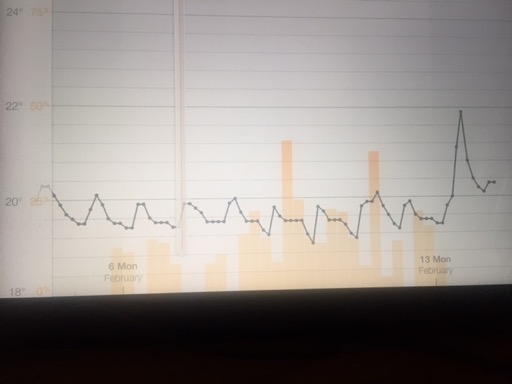
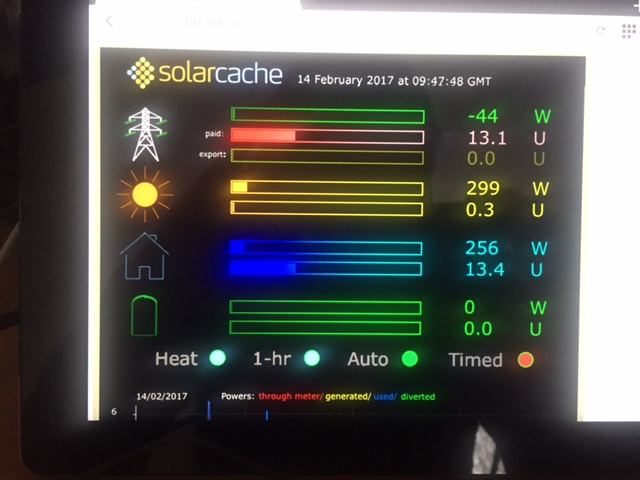
This is a 630watt panel and is connected via an Elgato Eve switch and power meter to a power socket. This means we can control it manually, via timing set periods or via various rules e.g. switch on if the external temperature is below 5 degrees. In practice it has been currently just set up to come on during the Economy 7 period. However with the stronger February sun and surplus PV generated electricity we have started diverting some of this to the heaters. This has the effect of raising the house temperature from our current 19.5 degrees base and delays the duct heater using imported electricity. The plot from the Netatmo application shows this effect. This shows a period of a week with diverted energy raising temperature on the 13th with no subsequent use of the duct heater (shown in pink). (note this is air temperature - the rapid rise and fall reflects poor heat capacity of air the surfaces of the structure change much less quickly and help buffer the air temperature)
Ideally one would set up a system to automate diversions but currently I simply keep an eye of the solarcache monitor and intervene via my phone!
We have it located in our bedroom and the temperature is similar across all the first floor. It can be controlled from anywhere using an app or web browser.
In mid-December we installed another Far infrared heater in the lounge and this partially resolved the heating issues that were caused by the distribution of heat from the MVHR duct heater (see We've moved in! - December)
This is a 630watt panel and is connected via an Elgato Eve switch and power meter to a power socket. This means we can control it manually, via timing set periods or via various rules e.g. switch on if the external temperature is below 5 degrees. In practice it has been currently just set up to come on during the Economy 7 period. However with the stronger February sun and surplus PV generated electricity we have started diverting some of this to the heaters. This has the effect of raising the house temperature from our current 19.5 degrees base and delays the duct heater using imported electricity. The plot from the Netatmo application shows this effect. This shows a period of a week with diverted energy raising temperature on the 13th with no subsequent use of the duct heater (shown in pink). (note this is air temperature - the rapid rise and fall reflects poor heat capacity of air the surfaces of the structure change much less quickly and help buffer the air temperature)
Ideally one would set up a system to automate diversions but currently I simply keep an eye of the solarcache monitor and intervene via my phone!
We've moved in!
10/11/16 16:56
We did move in straight after the final air-test. Thankfully this gave a final figure of 0.5 air changes per hour when tested at 50 pascals. We achieved 0.61 on the depressurisation test and 0.39 on pressurisation. The large difference between the figures was, according to air testing expert Paul Jennings, almost certainly caused by a failure in the membrane. Liam thinks some tape had come unstuck. This shouldn't happen with the tape used but we certainly had a dodgy roll of tape that caused problems with the need to re-tape in places. Clearly some faulty taping was missed. The other area of failure was in the sand-cement parge coat in Bed 2. Air could clearly be felt coming out of the stud wall through the electric sockets. Others should be able to realistically target an overall 0.3 air changes per hour when major works are undertaken in an existing property.
We are enjoying living in the house - even the cat although he no longer has a cat-flap. The only area that has caught us out is the heating. PHPP shows a maximum demand of around 1050 watts and the in-duct heater can supply 1200 watts so we shouldn't have a problem. What I failed to appreciate is that the heat is only delivered to rooms with air supply ducts - 4 in our case. However 3 of these are on the first floor with the other supplying the lounge. There is no supply to the basement. So if we only used the in-duct heater we would be more than 3 degrees warmer on the first floor than the lower floors. This is too much for comfort. Thankfully we anticipated heating issues in the Kitchen and Basement and have Redwell heaters in these locations (350 watts in the Kitchen) and (250 watts in the Basement). However we still have an issue in the lounge but we will address this by adding more heat. This should then enable us to lower the setting on the thermostat controlling the in-duct heater. Overall this shouldn't use any more energy just get it distributed more efficiently.
The general learning points seem to be to just use the MVHR for ventilation. Use a different solution for space heating - one that can address the energy requirement of each space. Also use a different solution for DHW (that is not the same system used in the space heating. The DHW system is proving to be a spectacular success. The plant room is within 0.5 degree of adjacent areas because of the very low losses from the Sunamp system.
Finishing Touches
08/10/16 16:52
The final air test is scheduled for the 18th October and we plan to move in shortly after! Currently we are moving our bits and pieces back into 11 Cromwell. A good opportunity to decide if we really need everything - we don't and this involves trips to the tip.
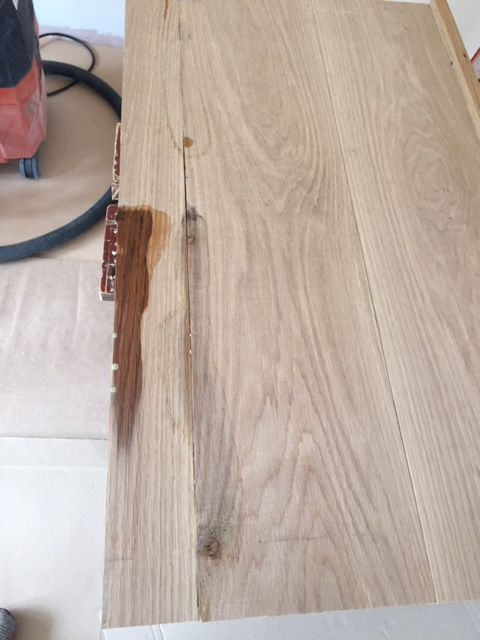
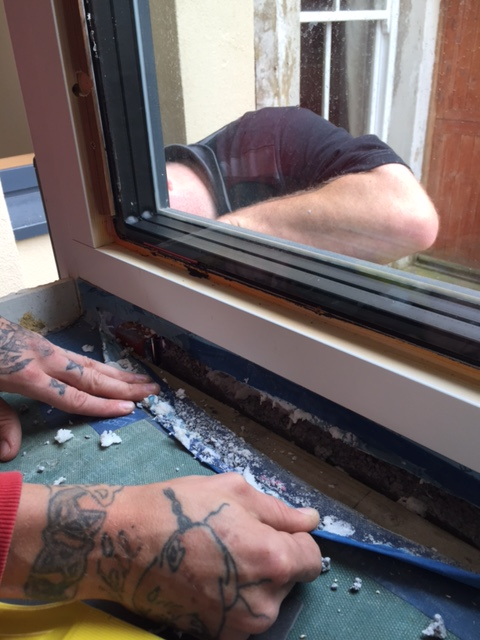
Progress has generally been slow but steady with just one set back. We returned one day to find a leak had occurred in the window area of the guest bedroom and damaged the window board. The water resting on top of some PIR insulation can be clearly seen below.
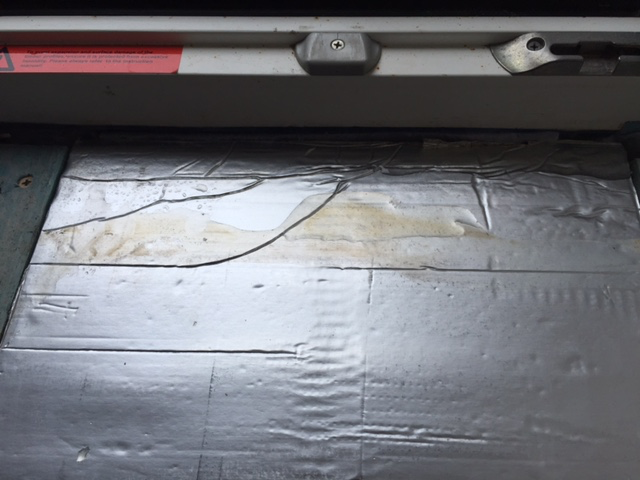
The damage to the board - which still awaits rework - was expansion through water absorption.
No one is clear how the water entered the house - it was not through the window but might have been wind-driven though a screw-hole attached to the vertical face of the window cill. It occurred when there was heavy rain and strong winds. In the last eight weeks there has been no further ingress.
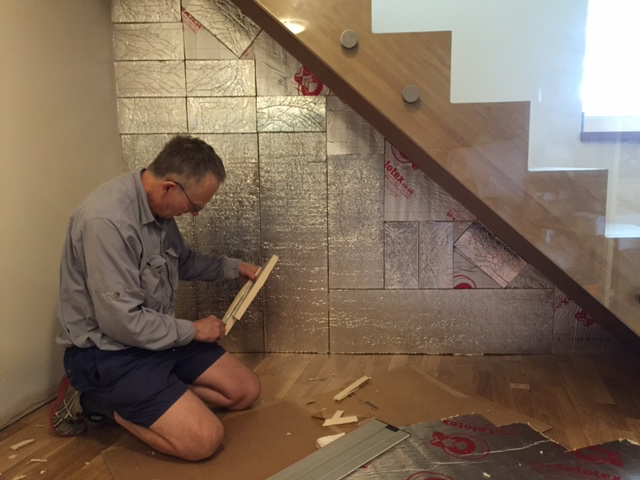
The remaining Vacuum Panels (VIPs) were used under the stairs to the basement. The shape meant a little PIR infill but this work mitigated the Thermal Bridge where the external wall meets the basement floor. Working with VIPs is much nicer than working with Aerogel!
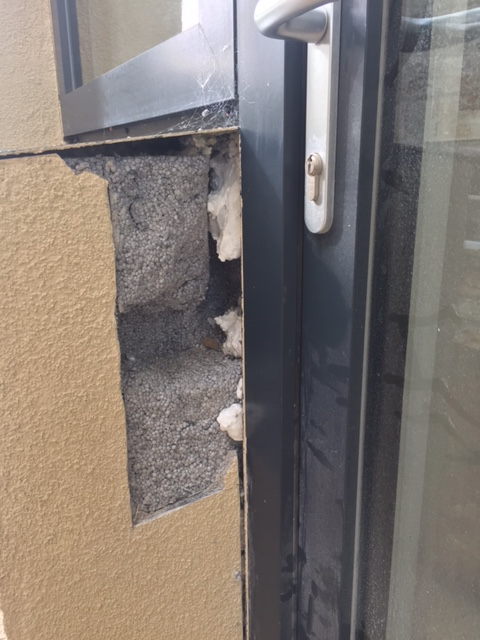
Ecohaus Internorm returned to fix the damaged window beads caused by water ingress. (see post from the 10th April) and adjust the Back Door - which has never shut properly. Chris (Ecohaus) checked the squareness of the door and found it was bowed by 4mm over its 2m height. He explained that Internorm allow for 2mm per metre and this can be adjusted for using the door's catches. He did warn that if this were not possible the door frame would need to be adjusted to remove some of the bow. After a couple of hours taking the door off and putting it back on Chris decided that it couldn't be adjusted because the 4mm was essentially all in the lower 1 metre. To move the door frame meant removing the screws from the central bracket holding the frame. Where was this? Luckily I had a photo which showed the brackets were external - under the insulation and render! Damage was inevitable. Photo below shows Chris searching for the bracket
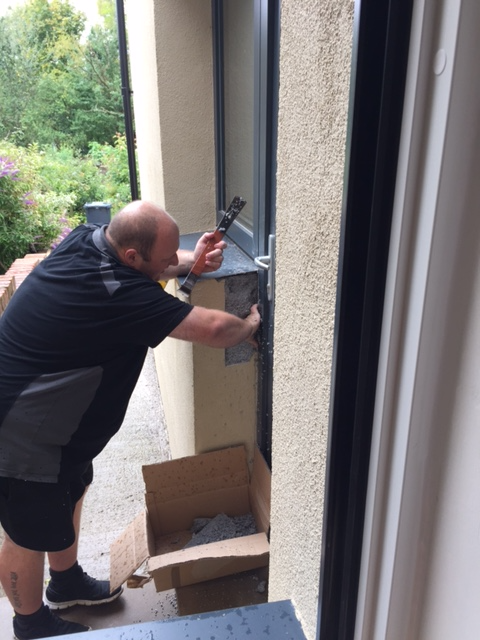
Since the door frame had to move the air tightness tape had to be cut (it was repaired later)
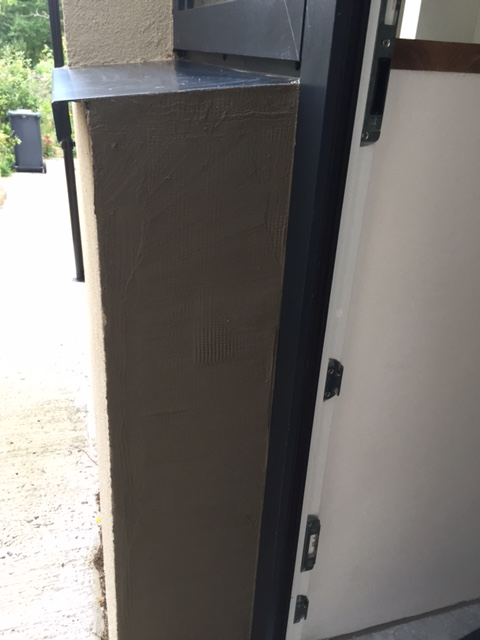
After a struggle to 'free' the door it was moved to eliminate most of the bow and refixed. It didn't take long after that to adjust the door so it sealed nicely against the frame. But we were left with imperfect render/insulation.
Pegasus were back on site within a few days and it didn't take long to fill with insulation then apply the scrim and base coat. It now needs to dry before the colour coat is applied.
The doors for the plant room are now in store ready for fixing in a few days. They seem to fill up most of the study!
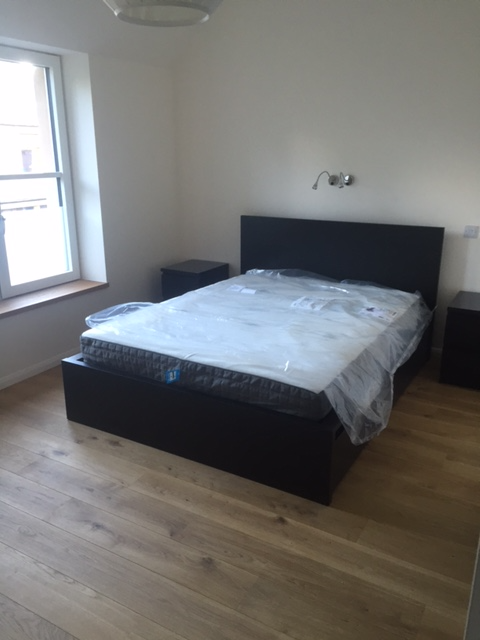
The new bed for the Master Bedroom is awaiting its first use!
Progress has generally been slow but steady with just one set back. We returned one day to find a leak had occurred in the window area of the guest bedroom and damaged the window board. The water resting on top of some PIR insulation can be clearly seen below.
The damage to the board - which still awaits rework - was expansion through water absorption.
No one is clear how the water entered the house - it was not through the window but might have been wind-driven though a screw-hole attached to the vertical face of the window cill. It occurred when there was heavy rain and strong winds. In the last eight weeks there has been no further ingress.
The remaining Vacuum Panels (VIPs) were used under the stairs to the basement. The shape meant a little PIR infill but this work mitigated the Thermal Bridge where the external wall meets the basement floor. Working with VIPs is much nicer than working with Aerogel!
Ecohaus Internorm returned to fix the damaged window beads caused by water ingress. (see post from the 10th April) and adjust the Back Door - which has never shut properly. Chris (Ecohaus) checked the squareness of the door and found it was bowed by 4mm over its 2m height. He explained that Internorm allow for 2mm per metre and this can be adjusted for using the door's catches. He did warn that if this were not possible the door frame would need to be adjusted to remove some of the bow. After a couple of hours taking the door off and putting it back on Chris decided that it couldn't be adjusted because the 4mm was essentially all in the lower 1 metre. To move the door frame meant removing the screws from the central bracket holding the frame. Where was this? Luckily I had a photo which showed the brackets were external - under the insulation and render! Damage was inevitable. Photo below shows Chris searching for the bracket
Since the door frame had to move the air tightness tape had to be cut (it was repaired later)
After a struggle to 'free' the door it was moved to eliminate most of the bow and refixed. It didn't take long after that to adjust the door so it sealed nicely against the frame. But we were left with imperfect render/insulation.
Pegasus were back on site within a few days and it didn't take long to fill with insulation then apply the scrim and base coat. It now needs to dry before the colour coat is applied.
The doors for the plant room are now in store ready for fixing in a few days. They seem to fill up most of the study!
The new bed for the Master Bedroom is awaiting its first use!
Window Boards
19/08/16 17:56
The last two weeks have been taken making Window Boards. Every Window is different which slows the process but the main reason for the time taken is our limited ability to fix the boards. The process commences with cutting the oak boards to approximate length and then cutting the holes for the biscuits. (Glenys is making sure the edges are clean in the photo below)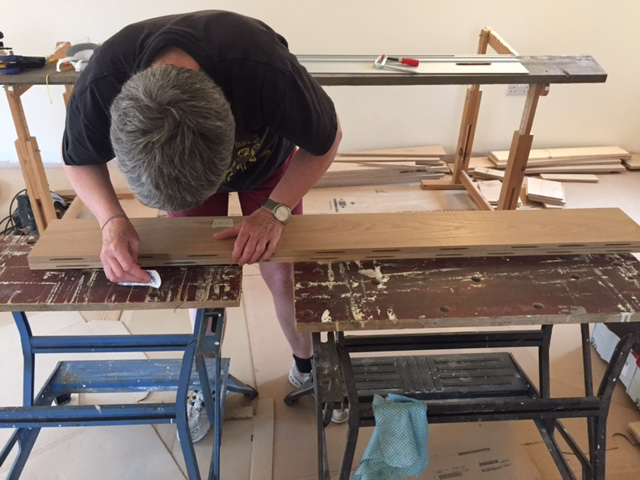
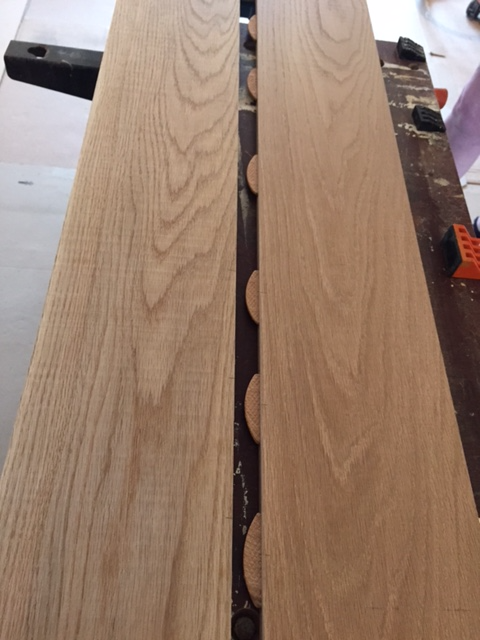
We then dry assemble to check for any problems - so far just two boards have distorted such that we had trouble aligning them prior to glueing. photo below show the dry assembly
We usually glue and clamp up the boards and leave them overnight. The long boards require both the Workmates for support.

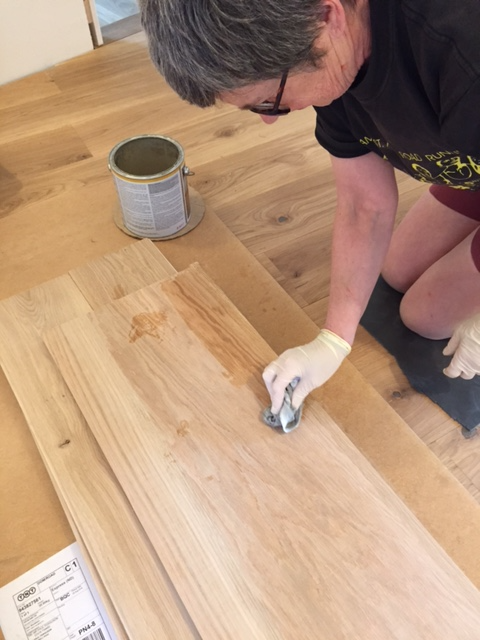
We then fix the 36mm Edge using more biscuits and again leave clamped up. (To mitigate Thermal Bridges we mostly use 12/15/18/20mm boards fixed with a 36mm deep edge. The complete board is then given a quick sand and then two coats of oil are applied (below).
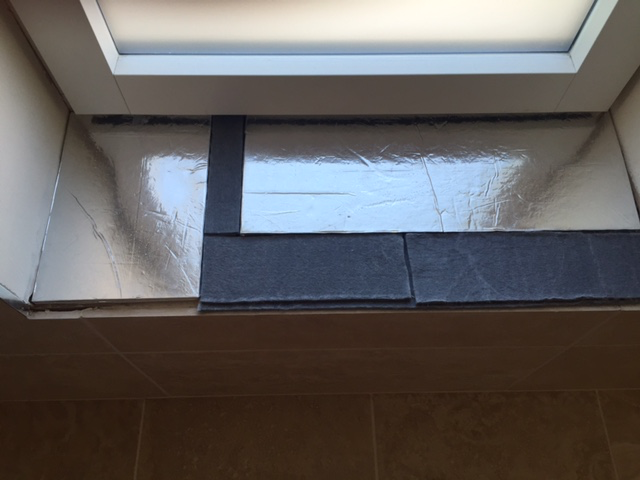
The complete board then has to be fixed in place. This is not easy since we can't use anything part from adhesive (to avoid puncturing the Air Tightness Tape or even worse puncturing a Vacuum Insulation Panel(VIP). The front elevation is the most crucial because of the Internal Insulation and the 'wrong' installation of the windows in the outside element. (But in the same position as the original windows) This means the reveals, head, and cill are adjacent to uninsulated stonework. The head and reveals already have been insulated with Vacuum Insulation Panels which leaves the cills. This is a slow process. Firstly a reference has to be identified for the top face of the Window Board - to both align with other elements and permit Windows to open. This then allows the cill to be filled with insulation to the correct depth. The en-suite window (below) opens which reduces the total depth available. We are using the VIPs we have left - ideally each cill would have a bespoke VIP. The two VIPs below are 10mm thick. What isn't shown are the two additional layers of 5mm Aerogel below the VIPs. So, thermally, the worst case here is 20mm Aerogel insulation - best case 10mm VIP/10mm Aerogel.
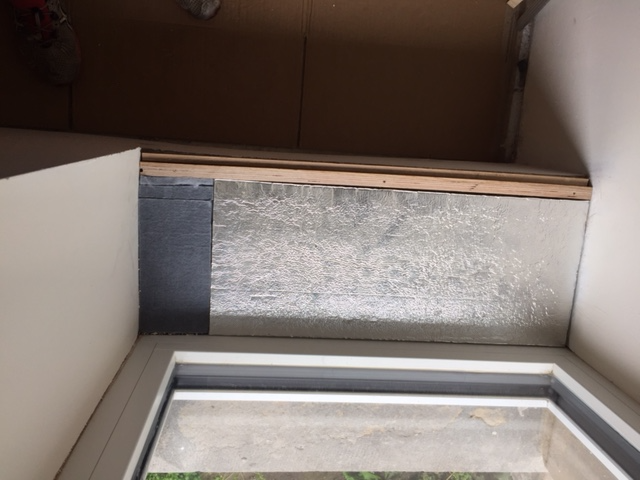
The Hall Window is shown below and here we have a 25mm VIP with the rest of the area filled with 25mm Aerogel - the windows on the ground floor front elevation are fixed and enable the Window Boards to be fitted 'higher'.
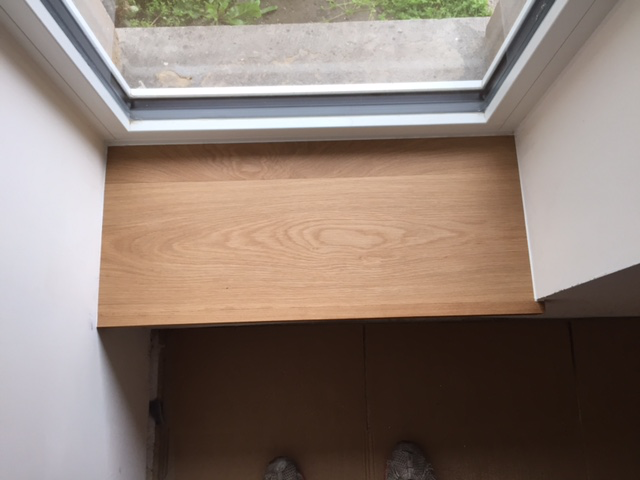
Finished board in situ below.
We then dry assemble to check for any problems - so far just two boards have distorted such that we had trouble aligning them prior to glueing. photo below show the dry assembly
We usually glue and clamp up the boards and leave them overnight. The long boards require both the Workmates for support.
We then fix the 36mm Edge using more biscuits and again leave clamped up. (To mitigate Thermal Bridges we mostly use 12/15/18/20mm boards fixed with a 36mm deep edge. The complete board is then given a quick sand and then two coats of oil are applied (below).
The complete board then has to be fixed in place. This is not easy since we can't use anything part from adhesive (to avoid puncturing the Air Tightness Tape or even worse puncturing a Vacuum Insulation Panel(VIP). The front elevation is the most crucial because of the Internal Insulation and the 'wrong' installation of the windows in the outside element. (But in the same position as the original windows) This means the reveals, head, and cill are adjacent to uninsulated stonework. The head and reveals already have been insulated with Vacuum Insulation Panels which leaves the cills. This is a slow process. Firstly a reference has to be identified for the top face of the Window Board - to both align with other elements and permit Windows to open. This then allows the cill to be filled with insulation to the correct depth. The en-suite window (below) opens which reduces the total depth available. We are using the VIPs we have left - ideally each cill would have a bespoke VIP. The two VIPs below are 10mm thick. What isn't shown are the two additional layers of 5mm Aerogel below the VIPs. So, thermally, the worst case here is 20mm Aerogel insulation - best case 10mm VIP/10mm Aerogel.
The Hall Window is shown below and here we have a 25mm VIP with the rest of the area filled with 25mm Aerogel - the windows on the ground floor front elevation are fixed and enable the Window Boards to be fitted 'higher'.
Finished board in situ below.
August update
05/08/16 17:37
Good news - the house has been signed of by the Building Inspector and we have our Completion Certificate. However the house is still not complete despite Glenys and I spending most of the week on the remaining tasks.
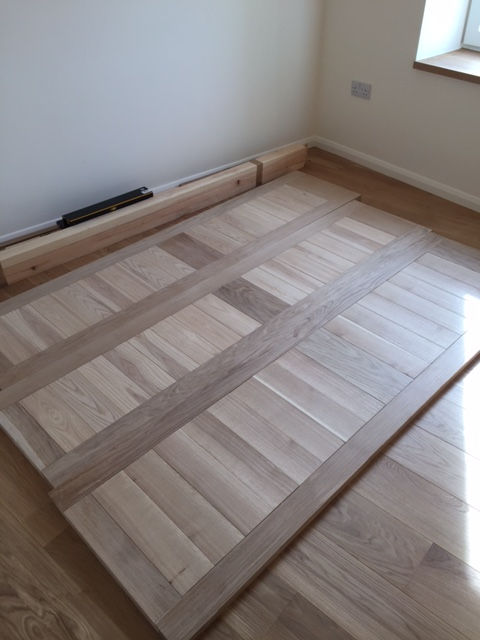
We have been focusing on the wood flooring and the ground floor and basement stair area are now finished. (Photo below taken below oiling the floor on the left)
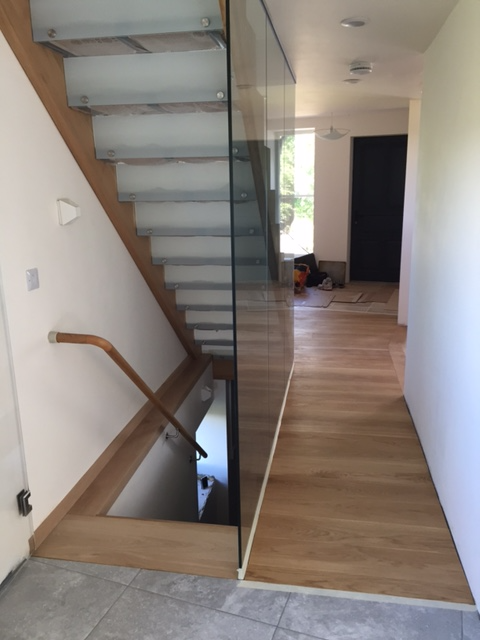
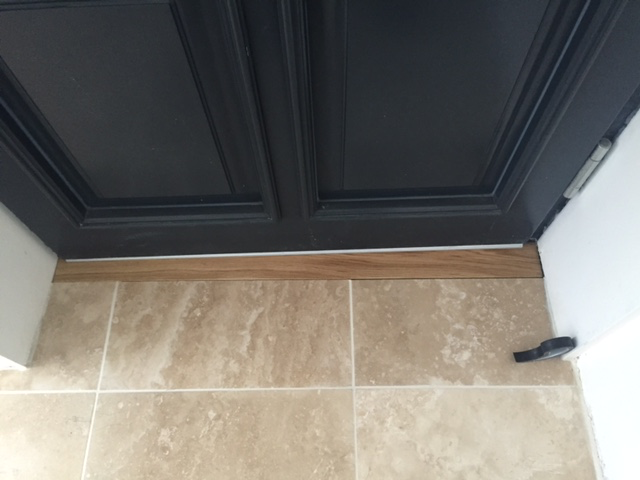
Thermal Bridge analysis suggested that stopping the Travertine before the front door threshold and inserting a strip of oak would reduce overall heat loss. This has been duly done with extra aerogel inserted around the periphery.
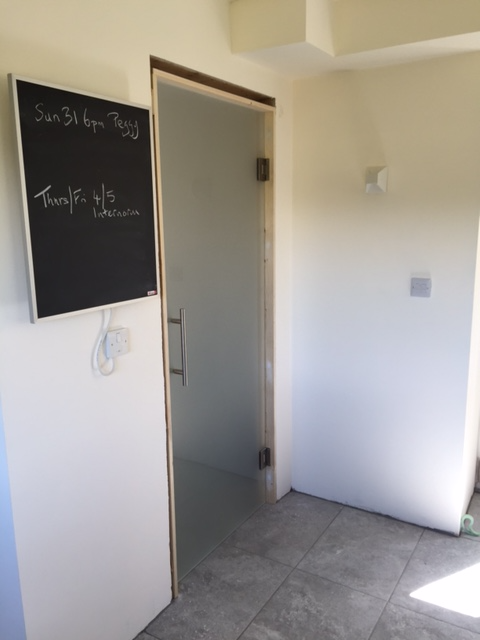
The three internal doors to Guest Bedroom, Bathroom and the WC have also been installed but the architraves still have to be fitted. The sand blasted doors offer privacy but cut out little light. They also complement the clear glass door to the Basement.
Competition of the flooring to the First Floor is current top priority and the Mitre Saw and Circular Saw are set up in the Lounge Workshop. The Lounge/Dining Room gives all the room we need for ripping the 2m Oak Floorboards. Its also useful for the other tools we keep using - the Fein Multitool, Mafell Jigsaw and the Lamello Biscuit jointer.
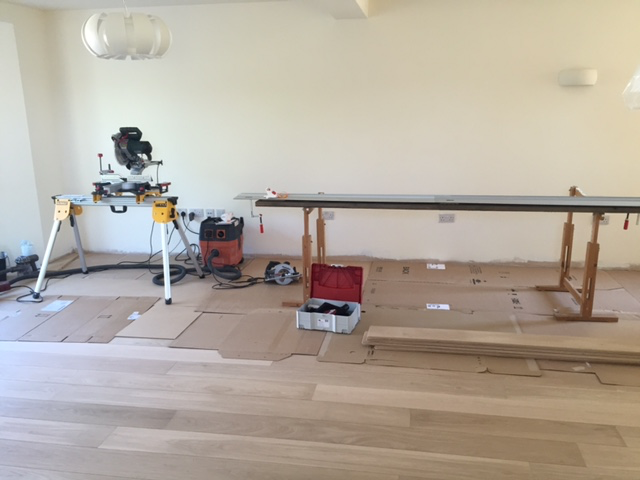
The Dust extractor is the tool most heavily used and this is complemented by the Dyson cordless. Despite our best endeavours the house will need serious cleaning before we move in.
We have been focusing on the wood flooring and the ground floor and basement stair area are now finished. (Photo below taken below oiling the floor on the left)
Thermal Bridge analysis suggested that stopping the Travertine before the front door threshold and inserting a strip of oak would reduce overall heat loss. This has been duly done with extra aerogel inserted around the periphery.
The three internal doors to Guest Bedroom, Bathroom and the WC have also been installed but the architraves still have to be fitted. The sand blasted doors offer privacy but cut out little light. They also complement the clear glass door to the Basement.
Competition of the flooring to the First Floor is current top priority and the Mitre Saw and Circular Saw are set up in the Lounge Workshop. The Lounge/Dining Room gives all the room we need for ripping the 2m Oak Floorboards. Its also useful for the other tools we keep using - the Fein Multitool, Mafell Jigsaw and the Lamello Biscuit jointer.
The Dust extractor is the tool most heavily used and this is complemented by the Dyson cordless. Despite our best endeavours the house will need serious cleaning before we move in.